Text Editor
What is the Text Editor?
The Text Editor lets you format and edit content in a way that closely resembles how it will appear when published, similar to the text editors found in most word processing applications.
The Text Editor is available on all content types and is one of the primary tools used to display and format content. Some formatting options may be limited—for example, underlining text is unavailable because underlines are reserved to indicate hyperlinks.
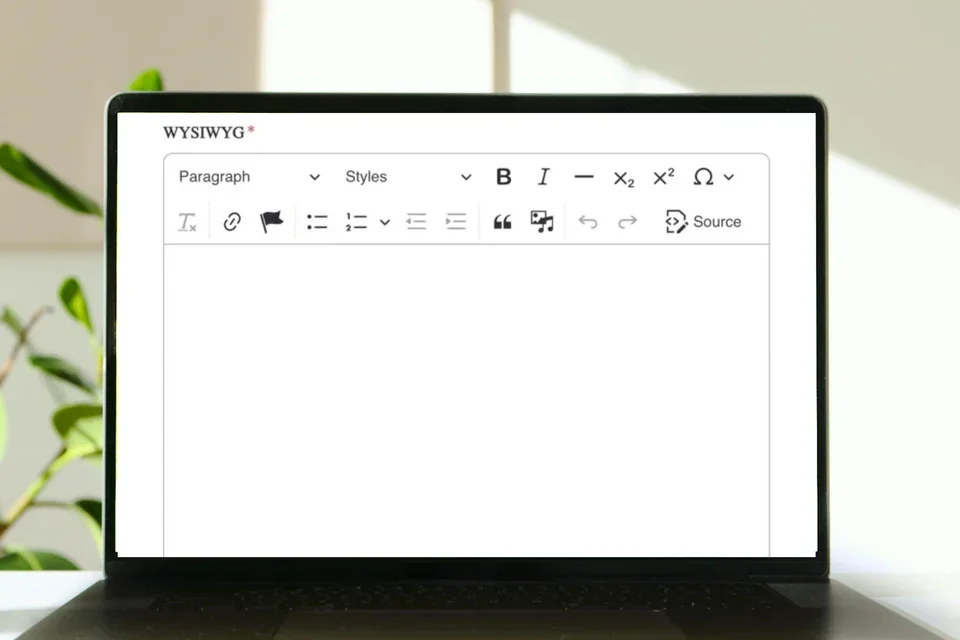
Icons and their meaning:
Paragraph
Format - Allows you to select the type of text you are entering so that the appropriate color and size can be applied.
Additional Information
Below you will find a list of the names of the format options and what they look like.
Paragraph
Heading 2
Heading 3
Heading 4
Styles
Styles - Select additional formatting for your text. The options depend on the type of text selected. e.g. If you select a bullet list, you are able to change the bullets from a numbered list to an alpha list.
B
Bold - Highlight text and click the B icon to make it bold.
I
Italic - Highlight text and click the I icon to make it italic.
__
Insert Horizontal Line - Easily add a horizontal line or divider across the page, creating a visual break between sections of content.
Example of a horizontal line:
X2
Subscript - A formatting style that displays text, numbers, or symbols slightly below the regular text line in a smaller font. This is used in chemical formulas, mathematical expressions, and technical documentation.
X2
Superscript - A formatting style that displays text, numbers, or symbols slightly above the regular text line in a smaller font. Used for footnotes, mathematical notations, scientific formulas, and to clarify information without disrupting the main text flow.
Ω
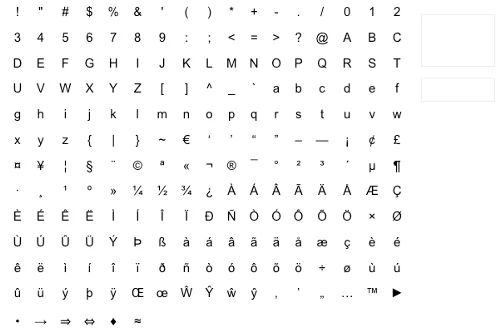
Insert Special Characters - WYSIWYG characters, special unicodes for subscripts, superscripts, and proper accents.
Learn more about Special Characters
Establish where you would like the special character to appear and then:
- Have your cursor in the correct place.
- Click on the special character icon: Ω
Click on the desired special character.
- Click save.

Remove Format - Removes formatting from content.

Link - Insert link to other content.
If you would like to make a button, follow these instructions: Once you have made the text that you want to be a button, select the Styles option and, from the menu, select the desired button type.
Adding a Link
To create a link:
- Highlight the desired text.
Click the link icon.

Add the URL.
For links to internal sites, start typing the name of the page, and a list will automatedly populate.
For links to external sites, add the full URL (https://www.google.com).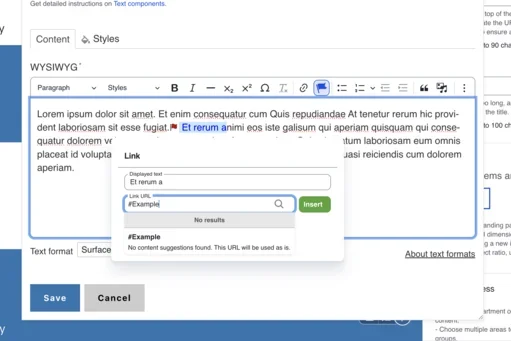
Click Save.
The referenced media source is missing and needs to be re-embedded.
Adding a Button
To create a button:
- First create a link.
(See instructions above.) - Highlight the desired link.
- Select Styles in the dropdown menu.

4. Select the desired button type.
5. Click Save.
Link to an Email Address
To link to an email address:
- Highlight the desired text.
Click the link icon.
Add "Mailto:" and then the email address.
(e.g., Mailto:Example@mednet.ucla.edu)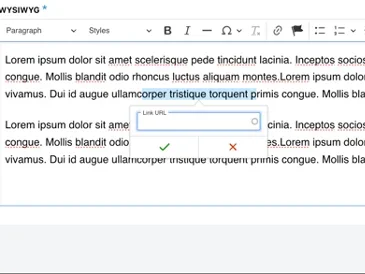
- Click Save.
Link to a Phone Number
To link to a phone number, follow these steps:
- Highlight the desired text.
Click the link icon.
Add "tel:" and then the phone number.
(e.g., tel:123-123-1234)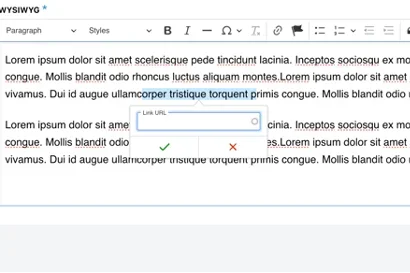
- Click Save.
Additional Information
To add an anchor link, follow these steps:
- Go to where you want the link to take you.
Click on the anchor link button.

Type a unique and memorable name (e.g. "Example").
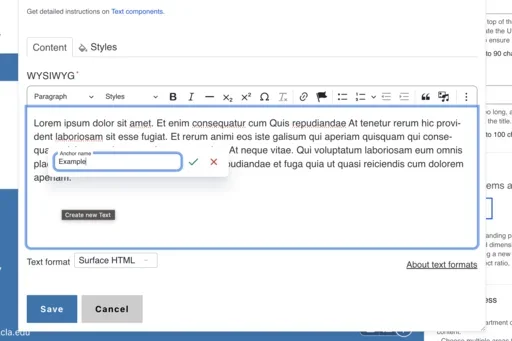
- Now go the the text you are linking from and highlight the text.
Click on the link icon.
- In the URL field, type "#" and then your memorable name from step 3 (e.g. "#Example").
-
- Click save.
Changing the Starting Number
To change the starting number, follow these steps:
Click on the down arrow beside the numbered list icon.

In the "start at" field, change the number to the desired number.
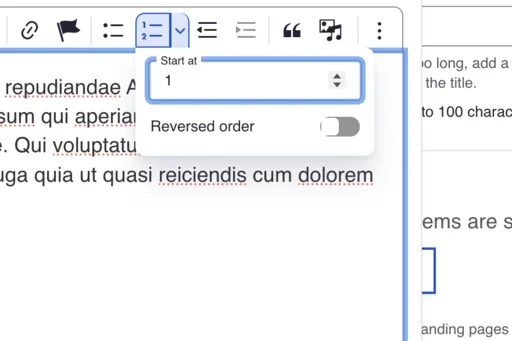
- Click save.
Reversing the Order of a Numbered List
To have your numbered list start in reverse order:
Click on the down arrow beside the numbered list icon.
Toggle the reverse order button.
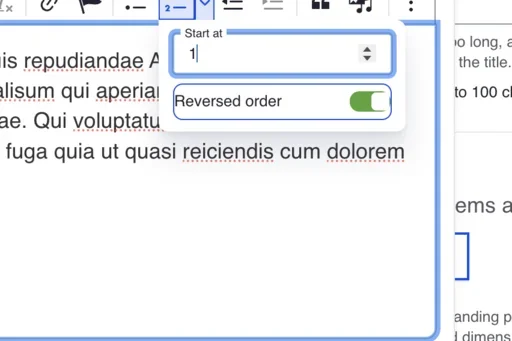
- Click save.
Alert
Adding an Image
To add an image, follow these steps:
Click on the insert media button.

- Choose image.
- Select the desired image.
Click the insert selected button.
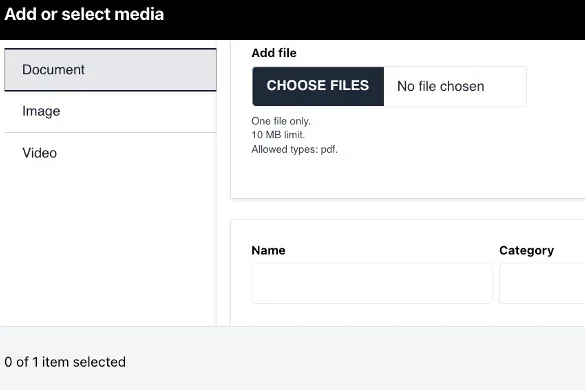
- Click save.
Adding a Caption to an Image
To add a caption, follow these steps:
- Click on the image, and the option image menu will appear above the image.
Click on the caption icon.

- Add the caption to the bottom of the image.
- Click save.
Making an Image a Hyperlink
To make an image a link when a user clicks on the image, follow these steps:
- Click on the image, and the option image menu will appear above the image.
Click on the link icon.
Add your link.
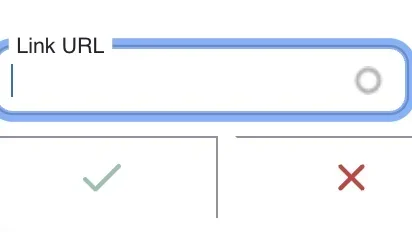
- Press the green check mark
- Click save.
Changing the Alt Text
To change the alt text of an image on the page, follow these steps:
- Click on the image, and the option image menu will appear above the image.
Click on the override alt text button.

Add your new alt text.
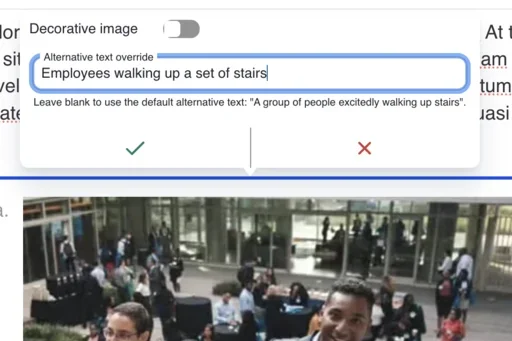
- Click save.
Note: This will only affect the alt text on the current page.
Changing the Aspect Ratio (Size) of an Image
To change the aspect ratio (size) of an image on the page, follow these steps:
- Click on the image, and the option image menu will appear above the image.
Select the desired aspect ratio (size).
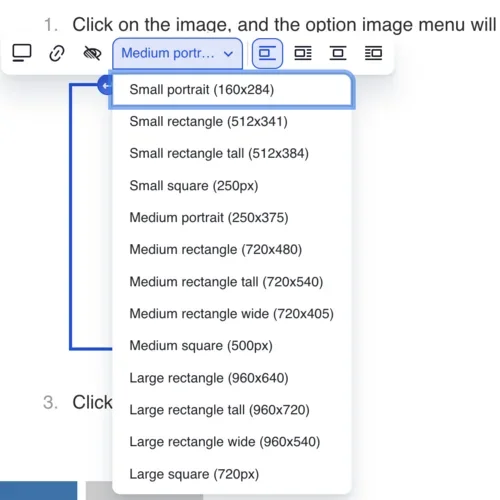
- Click save.
Changing the Alignment of the Image
To change where the image is placed on the page, follow these steps:
- Click on the image, and the option image menu will appear above the image.
Click on the desired placement of the image.

- Click save.